



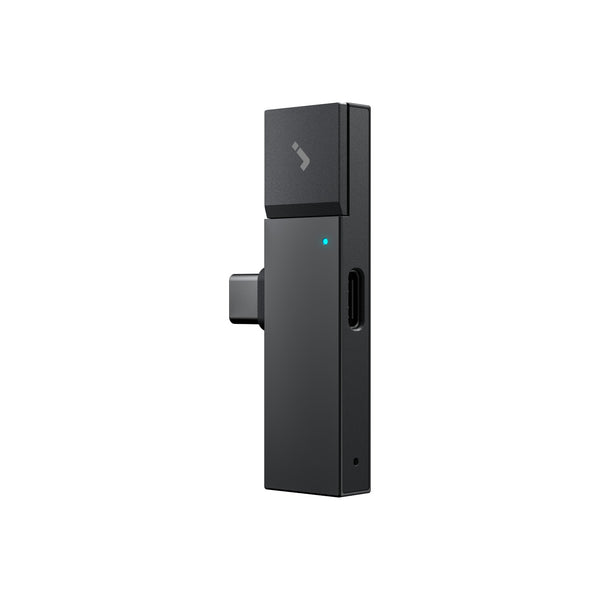

Your HiDock H1 Lite is a hardware AI meeting recorder built for Mac mini and fixed desktop setups. In under 10 minutes, you’ll have it capturing both sides of your calls, transcribing automatically, and delivering clean meeting notes through HiNotes. This guide walks you through every step — from unboxing to your first recording.
If you’re still evaluating whether H1 Lite fits into your desk setup, the full HiDock H1 Lite review covers what the device does, how BlueCatch™ works, and how it compares to software AI notetakers. Come back here when you’re ready to set up.
What's in the Box
Every HiDock H1 Lite ships with the device, a USB-C cable, and a Quick Start Guide. No additional accessories are required — you only need your existing Bluetooth earphones and a computer with a USB-C port to get started.
- HiDock H1 Lite device
- USB-C cable
- Quick Start Guide
Before starting, have your Bluetooth earphones nearby and a browser open for creating your HiNotes account.
How to Set Up HiDock H1 Lite on Mac mini — Step by Step
Step 1 — Create your HiNotes account
HiNotes is the companion app where all your recordings are transcribed, summarized, and stored. Creating your account first means everything is ready to register your device the moment you plug it in.
- Go to HiNotes in any browser
- Create a free account with your email
- Keep the tab open — you’ll associate your H1 Lite in Step 2 once it’s connected
HiNotes is also available on iOS and Android — download the app now so you can review recordings from anywhere.
Step 2 — Connect H1 Lite to your computer via USB-C and register it in HiNotes
Plug the included USB-C cable into the port on the back of H1 Lite and connect to your Mac mini, iMac, or desktop. The LED ring on the HiDock Key lights up — this confirms the device is powered and recognized by your computer.
Before you can sync recordings, you’ll need to associate your H1 Lite with your HiNotes account:
- Open HiNotes
- Click “Add Device”
- Select your H1 Lite and complete the device linking process
- Once linked, HiNotes will confirm that your device is ready to sync recordings and generate transcripts
Tip: Device association only needs to be completed once during initial setup. After that, your H1 Lite will automatically connect to your HiNotes account whenever it’s plugged in.

H1 Lite is bus-powered — no separate power adapter needed. It draws power directly through the USB-C connection.

Step 3 — Pair your Bluetooth earphones to H1 Lite — not your computer
With H1 Lite powered and connected, you can now pair your earphones. For BlueCatch™ to record both sides of your call, earphones must be paired directly to H1 Lite — not to your Mac mini or computer.
First-time setup:
Put your Bluetooth earphones into pairing mode (for AirPods Pro, open the charging case and hold the setup button until the status light flashes white).
- Open HiNotes, go to Device → Configurations, and tap BlueCatch → View Devices
- Select your Bluetooth earphones from the list to initiate the connection from H1 Lite to your earphones
- Wait for the connection to complete. Once paired, your earphones will be saved to H1 Lite.
After the initial setup — reconnecting:
Your earphones will reconnect automatically when H1 Lite is powered on. If they don't reconnect automatically, short press the BlueCatch™ Button on H1 Lite to initiate a manual reconnection.
To disconnect your earphones manually, press-and-hold the BlueCatch™ Button for 3 seconds. The LED will blink blue 3 times and you'll hear "BlueCatch Release."

Step 4 — Set H1 Lite as your audio input and output
On Mac: System Settings → Sound → select HiDock H1 Lite as both Input and Output.
On Windows: Right-click the speaker icon → Sound Settings → set HiDock H1 Lite as the default input and output device.

You can also set it per platform — inside Zoom, Teams, or Google Meet, go to audio settings and select H1 Lite as microphone and speaker there.
Set it as your system default once and you won’t need to configure it inside each app individually.

Step 5 — Record your first meeting
Record your first meeting
You’re set up. Here’s how recording works:
To start recording: Press and hold the HiDock Key for 3 seconds. Once recording begins, the LED indicator will turn Cyan, confirming that recording is active.
During the meeting: Press the HiDock Key once to drop a VoiceMark — a timestamped bookmark that flags decisions, action items, or key figures you'll need later. The LED flashes white briefly to confirm each VoiceMark.
To stop recording: Press and hold the HiDock Key. The LED stops pulsing.
H1 Lite stores up to 170 hours locally — sync whenever it's convenient or enable Auto Transfer in HiNotes → Device → Configurations.
Step 6 — Upload to HiNotes and get your transcript
After your meeting, recordings transfer to HiNotes automatically — no manual file transfer needed unless you choose to turn it off. An internet connection is required for transcription processing.
Within minutes, HiNotes delivers:
- A full timestamped transcript in your language (75+ supported), fully searchable
- An AI-generated meeting summary
All H1 Lite owners get the HiNotes Member plan free — this includes unlimited transcription minutes, 8 summary templates, VoiceMarks, and 75+ language support, at no extra cost, for the life of the device. HiNotes Pro is an optional paid upgrade that adds speaker identification, 39+ summary templates, export to Word/PDF/Markdown, integrations with Notion, Google Docs and OneNote, and AI Insight features.*

For details on how HiNotes stores and protects your recordings, see the HiDock Privacy Policy at HiDock
HiNotes is free for all H1 Lite owners. Unlimited transcription is included at no extra cost with your purchase — see hidock.com for current terms.
Recording regulations vary across countries and regions. To help ensure a smooth experience, we recommend informing participants and reviewing any local requirements that may apply to your situation. Additional information is available in our Privacy Policy
Understanding the Two Recording Modes
H1 Lite switches modes automatically — no configuration needed.
Call Mode
Activates automatically when Bluetooth earphones are paired to H1 Lite. Records both sides of virtual calls — Zoom, Teams, Meet, and any other platform — locally on the device. No bot or third-party app joins the call as a participant.
Room Mode
Activates automatically when no earphones are connected. Optimized for face-to-face conversations, client interviews, and team huddles at your desk. H1 Lite acts as a standalone AI speakerphone and recorder.
The BNC Slide on the side controls noise reduction. Slide up for noisier environments like open offices or shared workspaces.
How to Use VoiceMark During a Meeting?
During any active recording, press the HiDock Key once to drop a VoiceMark — a timestamped bookmark in the audio file. The LED flashes white briefly to confirm. When HiNotes processes the recording, VoiceMarked moments appear at the top of your transcript so you can jump directly to flagged decisions, action items, or key figures without scrubbing through the full recording.
Troubleshooting: The Most Common Setup Issues
Only my voice is being recorded — the caller’s side is missing
Your Bluetooth earphones are paired to your computer instead of H1 Lite. If they keep auto-connecting to your computer, temporarily remove them from your computer’s Bluetooth list, then re-pair them directly to H1 Lite following Step 3. You can re-add them to your computer later for non-call use. BlueCatch™ only captures both sides when earphones are connected to H1 Lite.
My recordings aren’t syncing to HiNotes
When syncing, confirm your device is plugged in. Check that you have an active internet connection — transcription requires connectivity to process.
There’s an echo or poor audio quality on the call
Slide the BNC Slide up slightly to increase noise reduction. Confirm that H1 Lite is set as both the microphone and the speaker in your platform settings — using a second speaker simultaneously (such as an external display’s audio output) can cause echo
Frequently Asked Questions
How do I set up the HiDock H1 Lite?
Connect via USB-C, set H1 Lite as your audio device, pair your Bluetooth earphones to H1 Lite directly, create a HiNotes account at hinotes.hidock.com, then press and hold the HiDock Key for 3 seconds to record. Full setup takes under 10 minutes. Always comply with recording consent laws in your jurisdiction.
How do I pair Bluetooth earphones to H1 Lite?
For first-time pairing: put your earphones in pairing mode, then open HiNotes → Device → Configurations → BlueCatch → View Devices, and select your earphones from the list. H1 Lite connects to your earphones — not the reverse. Once paired, earphones are saved to the device.
To reconnect after initial setup: your earphones reconnect automatically when H1 Lite powers on. If needed, short-press the BlueCatch™ Button on H1 Lite to reconnect manually.
Earphones must be paired to H1 Lite — not your computer — for two-sided recording to work.
How do I record a meeting with H1 Lite?
Press and hold the HiDock Key for 3 seconds to start — the LED turns Cyan. Press once during the meeting to drop a VoiceMark. Press and hold to stop. Connect via USB-C to sync to HiNotes. Always comply with recording consent laws in your jurisdiction before recording any call or conversation.
Does H1 Lite work with Zoom, Teams, and Google Meet?
Yes. Set H1 Lite as your microphone and speaker in each platform's audio settings. It works with Zoom, Microsoft Teams, Google Meet, Webex, Discord, FaceTime, WhatsApp, Slack, and any platform that supports external audio devices.
Why is only one side of my call being recorded?
Your earphones are connecting to your computer instead of H1 Lite. Temporarily remove them from your computer's Bluetooth list and re-pair directly to H1 Lite via HiNotes → Configurations → BlueCatch™. BlueCatch™ only captures both sides when earphones are paired to the device.
How do I get my transcript in HiNotes?
Connect H1 Lite via USB-C after your meeting. Recordings sync automatically. HiNotes delivers a full transcript and AI summary within minutes. An internet connection is required.
What to Do After Your First Recording
Once you’ve completed setup, here’s what makes the biggest difference in the first week:
- Run a short test recording first — a 2-minute call with a colleague — to confirm both sides are captured cleanly before your next important meeting
- Explore HiNotes summary templates — the client call and 1:1 templates cut follow-up email time significantly
- Use VoiceMarks consistently — drop one every time a decision or action item comes up and you’ll never need to scrub through audio again
- Set H1 Lite as your system default audio device once — it stays selected across all platforms automatically
For the full picture on what H1 Lite does, how BlueCatch™ captures both sides of a Bluetooth call, and how it compares to software AI notetakers like Otter.ai — read the complete HiDock H1 Lite review at HiDock vs Otter.ai comparison
Need help? Reach HiDock support at support@hidock.com